Handheld laser particle counter operation process
- 2019-07-11
- 1061
- Esky Purify
Operation process of handheld laser particle counter
The operation of handheld laser particle counters on the market is basically the same. Take the American TSI9306 handheld laser
Operation steps:
1. Press the power button on the handle “
”to turn on the machine. After the TSI startup interface, enter the main interface

style="font-size:14px;"> 2. The following preparations need to be made for monitoring:
1. Location setting (used to mark the current monitoring location):At the bottom of the main screen, click “Settings——>“Location——>“Add...”. After entering, click the bar box to display the virtual keyboard for location editing (Chinese input is not supported). After editing, click the Enter key and click “Yes”to complete the location editing. 2. Detection size setting:Return to the "Settings" page, select "Sampling", select "Size" to modify the particle size to be detected. Up to six sizes can be detected at the same time. Each size can be modified through the soft keyboard in the "Size" box. The range must be between 0.3-10 μm. 3. Sampling time setting:On the "Settings" page, select "Sampling Time", where you can use the soft keyboard to modify the number of samples, sampling delay time, sampling interval time, each sampling time or each sampling volume. Select "Yes" after setting.
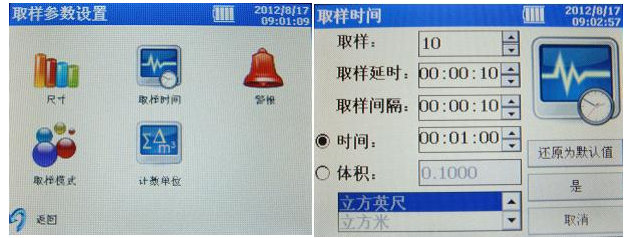
4. Sampling mode setting:Select "Sampling mode" in the "Settings" page, where you can set automatic mode, manual mode and buzzer mode. The specific usage of each mode is detailed later.
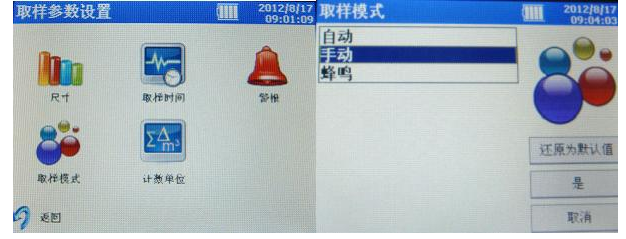
5. Counting unit setting:On the "Settings" page, select "Sampling", select "Counting Unit", where the count units can be modified as difference, cumulative value and concentration. Select "Yes" after setting.
3. Zero point calibration before detection
1. Turn on the instrument and the main menu appears;
2. If an isokinetic sampler is installed, remove it first. Zero point calibration cannot be performed when the instrument is equipped with an isokinetic sampler;
3. Install a zeroing filter at the inlet nozzle at the top of the instrument;
4. Press the start button and clean the instrument for 2 minutes;
5. After cleaning for 2 minutes, continue sampling. According to JIS standards, there should be no more than 1 particle of any size within 5 minutes.
4. Remove the zero filter, install the isokinetic sampler, and conduct the test:including automatic mode, manual mode and buzzer mode.
1. Automatic mode:Select "Sampling Mode" in the "Settings" page and select "Automatic". Enter the "Sampling Time" setting to set the number of samples, sampling delay time, sampling interval time, each sampling time or each sampling volume. After setting, click "Yes", then return to the main screen, select the set address name at the address down button, and click the green start button on the screen or the triangle button on the handle to start sampling. Sampling stops automatically after reaching the set number of samples.

2. Manual mode:Select "Sampling Mode" in the "Settings" page and select "Manual". Similarly, set the sampling time. In the manual setting, only the sampling delay time, each sampling time or each sampling volume setting is valid. Return to the main screen and press the start button to start sampling. Press the start button again to stop the measurement.

3. Buzzer mode:Select "Sampling Mode" in the "Settings" page, and select "Buzzer". "Sampling Time" can be left unset. In the "Settings" page, select "Sampling", and then select "Alarm". The alarm thresholds for molecules of different particle sizes can be set according to needs. After setting, click "Yes". Return to the main screen and press the start button to start the measurement. When the measured value exceeds the alarm setting threshold, the instrument will sound an alarm.

5. View previous test data:On the main screen of the instrument in standby mode, select the "Data" button at the bottom of the screen, and click the up and down keys on the right side of the screen to view previous test data.
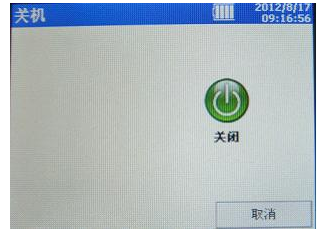
6. After the test is completed, press the power button and the screen displays OFF. Click this button to turn off the instrument.





 Home
Home Product
 News
News phone
phone